Hantavirus Guide: Six Steps To Properly Fitting Your Respirator

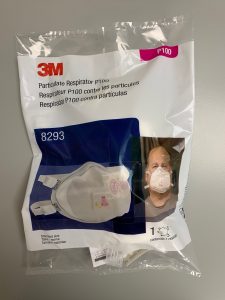
The Centre for Disease Control and National Institute of Occupational Safety and Health recommend the use of HEPA (P100) quality filters for respiratory protection against the Hantavirus.

Respirators come in various sizes and it is important to use a respirator that has been fitted to your face.

It is very important that workers are aware of how to achieve the maximum protection afforded by the approved respirator. This protection depends mainly on the seal between the wearer’s face and the respirator face piece. In order to prevent inward leaks of contaminated air, the wearer must be clean-shaven where the face piece contacts the skin of his/her face. Unusual facial contours, scars and other skin conditions, i.e. eyeglasses and missing dentures, may also interfere with the seal.

FIT CHECKING: SIX STEPS TO FITTING YOUR RESPIRATOR

  1. Cup respirator in either hand with molded nose section away from you and the straps freely draped below your hand.
  2. Position mask on your face. Be certain that the narrow-formed section rests comfortably on the bridge of your nose.
  3. With your other hand, draw the top strap over and position at the crown of your head. Next, draw the bottom strap over your head and position is as show at the base of your head.
  4. Adjust both straps as necessary to achieve a tight comfortable fit.
  5. The respirator should be fit checked prior to entering hazardous environments. Follow the respirator training practices of your company or refer to the manufacturer’s recommendations. The following are two techniques which can be used to check the fit of your respirator.
    1. Put on the size or respirator you have chosen according to the instructions on the box.
      1. Using your hands, cover the filter surface of the respirator, exhale and inhale to create a slight positive or negative pressure. If air leakage occurs, readjust the face piece and straps and retest.
      1. If a fit check-up is supplied with your respirator perform below steps.
    1. Hold the fit check cup in either hand with the molded nose section up and hard plastic shell side away from you.
    1. Position the fit check cup on your respirator being certain that the nasal areas of the cup rests against the nasal area of the respirator. The entire bottom edge of the foam flange around the edge of the fit check-up should contact the entire periphery of the respirator area where the flange meets the respirator shell.
    1. Inhale deeply to create a negative pressure. (You should be unable to inhale). If this does occur or if leakage occurs around the flange, reposition the cup on the respirator and repeat the above procedure again until a fit is achieved.
    1. If a proper fit is not achieved, see your supervisor for advice regarding respirator fitness and work assignment.
  6. You should leave the work area immediately and either reposition or replace the respirator if:
    1. Breathing becomes difficult.
    2. It is contaminated.
    3. You sense irritation, smell or taste contaminants.
    4. Dizziness or other distress occurs.
    5. Respirator becomes damaged.

A respirator must be fit tested prior to goggles or glasses being applied to face. An effective seal cannot be achieved with facial hair. Therefore, you must be clean-shaven when using a tight-fitting respirator.

Spread the love